
TM 10-1670-327-23&P
0054 00
REPLACE - continued
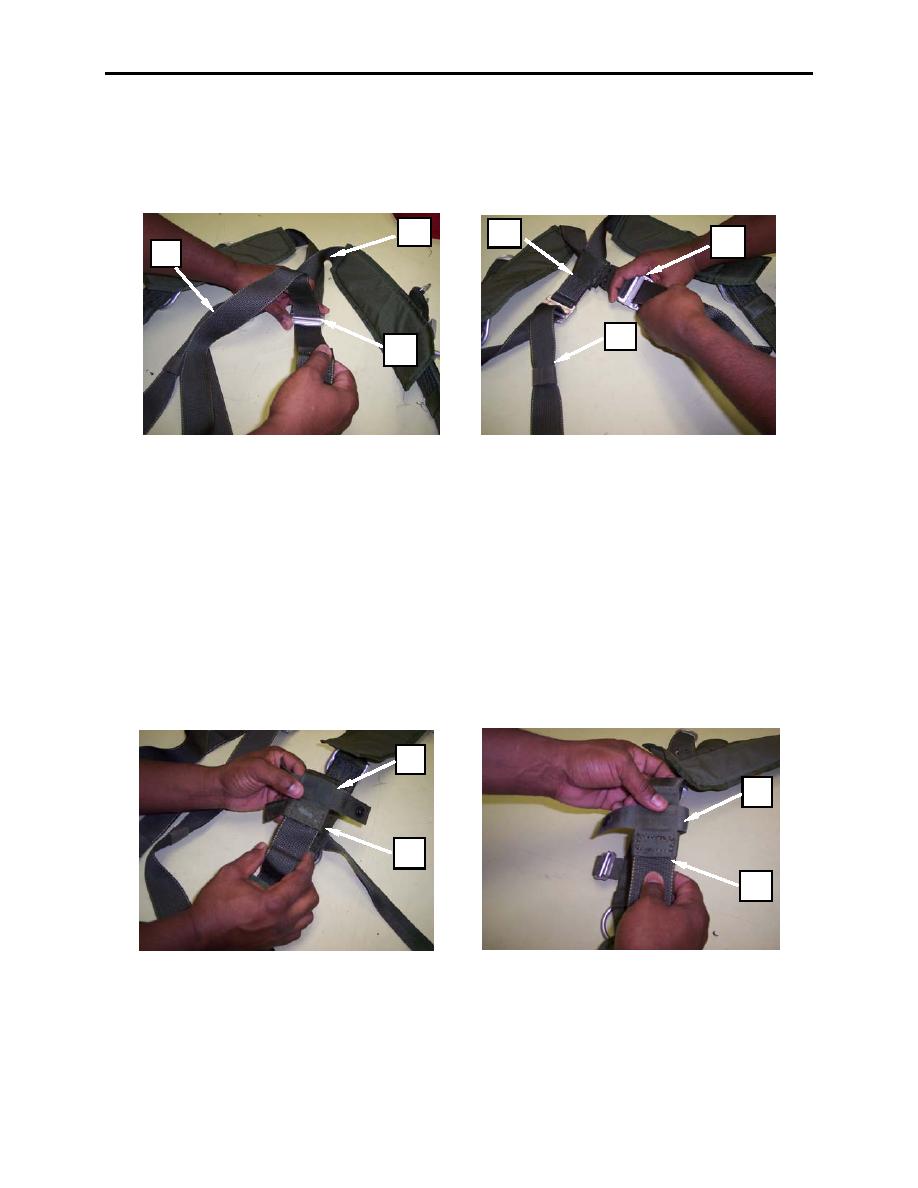
7. Attach the diagonal backstraps (figure 6, item 1) to the upper main lift web (figure 6, item 2), route
the diagonal backstraps (figure 6, item 1) through the diagonal backstrap adjustment buckles (figure
6, item 3) from top to bottom and back up through the diagonal backstrap adjustment buckle (figure
6, item 3).
2
2
3
1
1
3
Figure 6. Replacing the Saddle Assembly (continued).
8. Once the diagonal backstrap has been routed, do an overall inspection of the harness assembly to
ensure the diagonal backstrap and upper main lift web straps have been properly routed, should have
no twist.
9. Attach the tuck tab and snap fastener (figure 7, item 1) to the left and right upper main lift web strap
(figure 7, item 2), position the tuck tab and snap fastener (figure 7, item 1) so they are facing toward
the top of the harness assembly. Route the tuck tab wrap (figure 7, item 3), around the right upper
main lift web.
10. Sew the new tuck tab and snap fastener assembly (figure 7, item 1) onto the left and right upper
main lift web straps (figure 7, item 2). using a heavy duty sewing machine, size 5 nylon thread, 4 to 5
stitches per inch. Sew the tuck tab to the main lift web adjustment strap with a box stitch pattern. Use
this procedure for attaching the tuck tab and snap fastener to the left upper main lift web.
1
1
2
2
Figure 7. Replacing the Saddle Assembly (continued).
0054 00-4

