ARMY TM 10-1670-271-23&P
AIR FORCE TO 14D1-2-464-2
MARINE CORPS TM 01136B-23&P/1
9 Check the engagement of the installed snap fastener components with the opposite mating
components to ensure the open and closed snapping process is accomplished without hinderance. If
the snap engaging process cannot be accomplished without difficulty, replace the opposite mating
snap fastener components using the procedures in 3 through8 above.
10 As required, remove the chuck and die from the applicable snap fastener tools by reversing the
procedures in step 4 above.
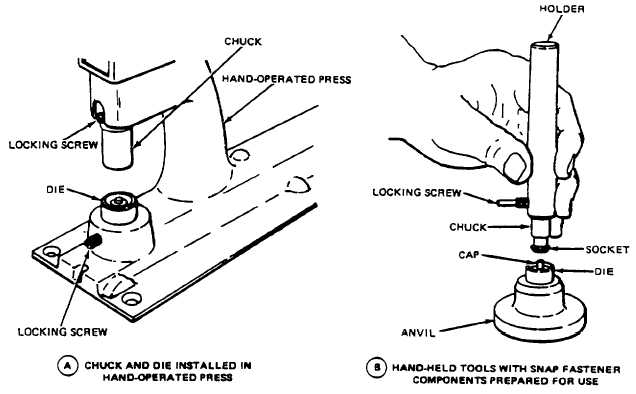
11 Installation of snap fastener assemblies by hand- or foot-operated press can be accomplished using
the procedures above, except the chuck and die will be secured within the applicable press assembly
using the available locking screws (figure 2-127).
Figure 2-127. Snap Fastener Installation Tools Prepared for Use.
(g) Position the new diagonal backstrap keepers as shown in A and B, figure 2-128, and sew in place
using a heavy duty sewing machine, size 3, nylon thread, 5 to 8 stitches per inch and a box X stitch
formation.
(h) Position a new horizontal backstrap keeper as shown in figure 2-129. Sew keeper in place using a
heavy duty sewing machine, size 3 nylon thread, 5 to 8 stitches per inch and a box X stitch
formation.
Change 2 2-169