TM 10-1670-292-23&P 0026 00
0026 00-2
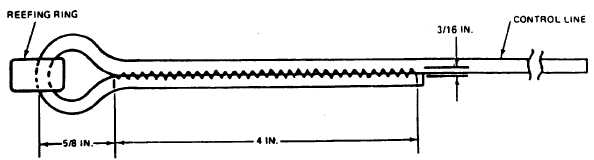
8. With the reefing ring position in the loop formed by the fold-back in the cord end, secure the control
line to the reefing ring with a single row (4-inch-long, 3/16-inch-wide) double-throw, zig-zag stitch
formation using 7 to 11 stitches per inch.
9. Trace each control line bridle and the attached control line from the point of attachment to the canopy
to the free-end of the control line.
10. Pass the control line free-end from the top, through the channel guide ring (located on the inside of
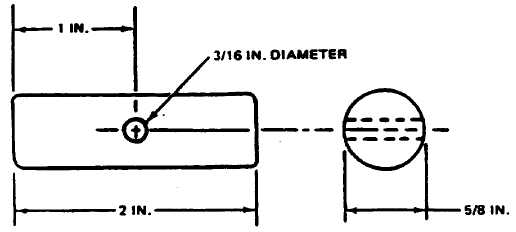
each rear riser), and further past the control line free-end, through a wood toggle. (Refer to the figure
detailed below for toggle construction details, if required.)
11. Position the toggle against the bottom of the guide ring and, while holding the toggle in position, pull
the control line free-end taut until the control line tension equals that of the suspension lines. Move
each toggle three inches from the channel guide ring. While holding each control line in position,
place one inch wide masking tape on the control line just above the toggle, wrapping the tape around
the riser once. Do not remove this tape.