TM 10-1670-268-20&P 0004 00
0004 00-7
(9)
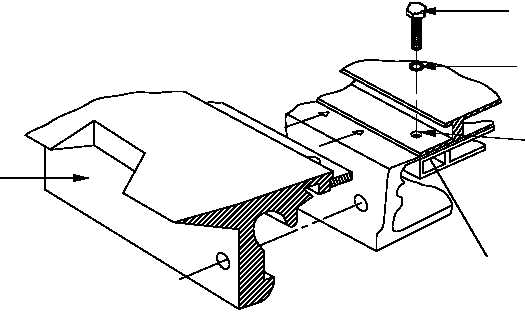
Select a side rail (1) of the same length as the assembled panels and position it along one
side of the platform, over lapping the outboard roller pad. Use a punch to align the bolt-
holes. Install 3/8-inch x 1¼-inch hex head bolts (2) with 3/8-inch flat washers (3) through the
side rail and the roller pad into the captive nuts (4). Start the bolts two or three turns by
hand.
(10) Repeat step (9), above, with another side rail of equal length on the opposite side of the
platform.
NOTE
No bolts can be missing from the extreme forward and rear platform
panel edges.
(11) Using an impact wrench with a 9/16-inch socket, tighten all roller pad bolts (1) installed in
the two in board roller pads (as shown in the illustration on the following page).
(12) Using an impact wrench with a 9/16-inch socket, tighten the roller pad bolts (2) and (3) to
within one-quarter inch of the top of the flat washer. This will ensure that the side rails are
securely attached. DO NOT fully tighten these bolts at this time. Refer to the illustration
on the following page for bolt locations.
OUTBOARD ROLLER PAD
NUT RETAINER
ASSEMBLY
(PORTION OF PANEL
ASSEMBLY NUT BAR
USED TO CONTAIN THE
CAPTIVE NUTS)
4
1
3
2