TM 10-1670-272-23&P 0037 00
0037 00-2
3. Cut a piece of 1.1-ounce rip-stop pattern nylon parachute cloth to conform to pattern (see step 2.,
above); fabricate new vent cap according to details illustrated, below. Make the seam before
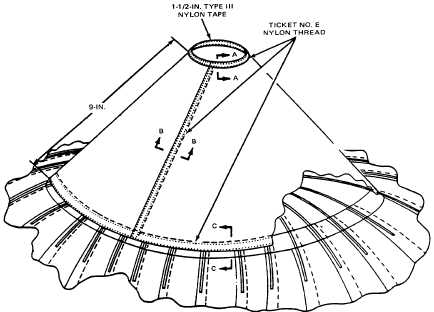
binding the top opening in the vent cap. Cut a piece of 1½-inch, type III tape, 10¾-inches-long;
sear the ends, and fold in half lengthwise. Overlap ends 1-inch, after turning raw edges of tape
¼-inch. Position and baste reinforcement to newly fabricated vent cap. Sew reinforcement band
to vent cap, with two rows of stitching, as indicated, below.
4. Smooth the canopy apex on the worktable. Center the new vent cap over the apex, with the bridle
loop centered under the vent cap opening.
5. Turn-under the raw edge of the vent cap until the measurement between the top edge of the vent
cap binding and the fold at the bottom is at 9-inches.
6. Position basted vent cap on the upper half of the lateral band and pin, or baste, in position.
7. Sew the vent cap to the upper lateral band, with two rows of stitching, as illustrated above.
8. Invert the canopy and trim the excess material so that the raw edge is just below the top edge of
the lateral band. Make a second row of stitching 1/16-inch from the top edge of the lateral band.
9. The stitching will be the same as specified in tables 1 and 2, WP 0012 00.
END OF WORK PACKAGE
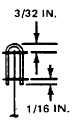
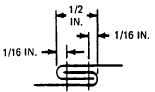
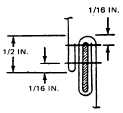
SECTION A-A SECTION B-B SECTION C-C