ARMY TM 10-1670-278-23&P
AIR FORCE T.O. 13C5-26-2
NAVY NAVAIR 13-1-27
2-44.
Deployment Bag Panels and Flaps (cont).
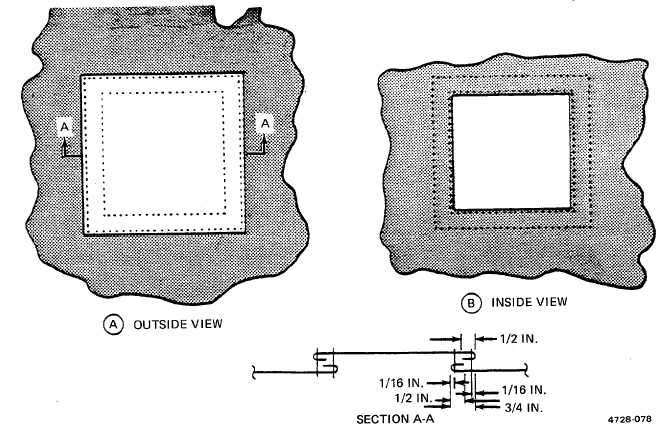
(c) Cut damaged area fabric along lines made in (b) above. Further cut fabric diagonally at each corner to
allow a 1/2-inch foldback in raw edges.
(d) Make a 112-inch foldback on each raw edge. Pin and baste each foldback to complete prepared hole.
Basting will be performed using procedures in paragraph 2-18a.
(e) Using nylon cloth, mark and cut a patch 2 1/2-inches wider and longer than inside measurements of the
prepared hole. Insure that patch material is marked and cut along the warp or filling of fabric.
(f)
Center patch material over prepared hole. Pin patch material in position.
(g) Make a 1/2-inch foldunder on each edge of patch material and baste patch to prepared area. Basting will
be performed using procedures in paragraph 2-18a.
(h) Remove pushpins securing the item to repair table and secure the patch by stitching. Use a medium-
duty sewing machine and stitch 7 to 11 stitches per inch using size FF nylon thread (figure 2-68). Make
first row of stitching completely around patch. Turn deployment bag inside out and make a second row
of stitching around prepared hole.
(4) Restenciling. As required, restencil identification markings using procedures in paragraph 2-20.
Figure 2-68. Patching Deployment Bag Panels and Flaps.
2-116