TM 10-1670-327-23&P
0021 00
REPLACE
Replace missing or damaged vent lines as follows:
1. Place canopy in proper layout on the table and trace the damaged vent line across the apex, from
upper lateral band.
2. Remove the damaged vent line by cutting stitching that holds the line to the canopy at both sides of
the apex.
3. Remove all loose or broken stitching.
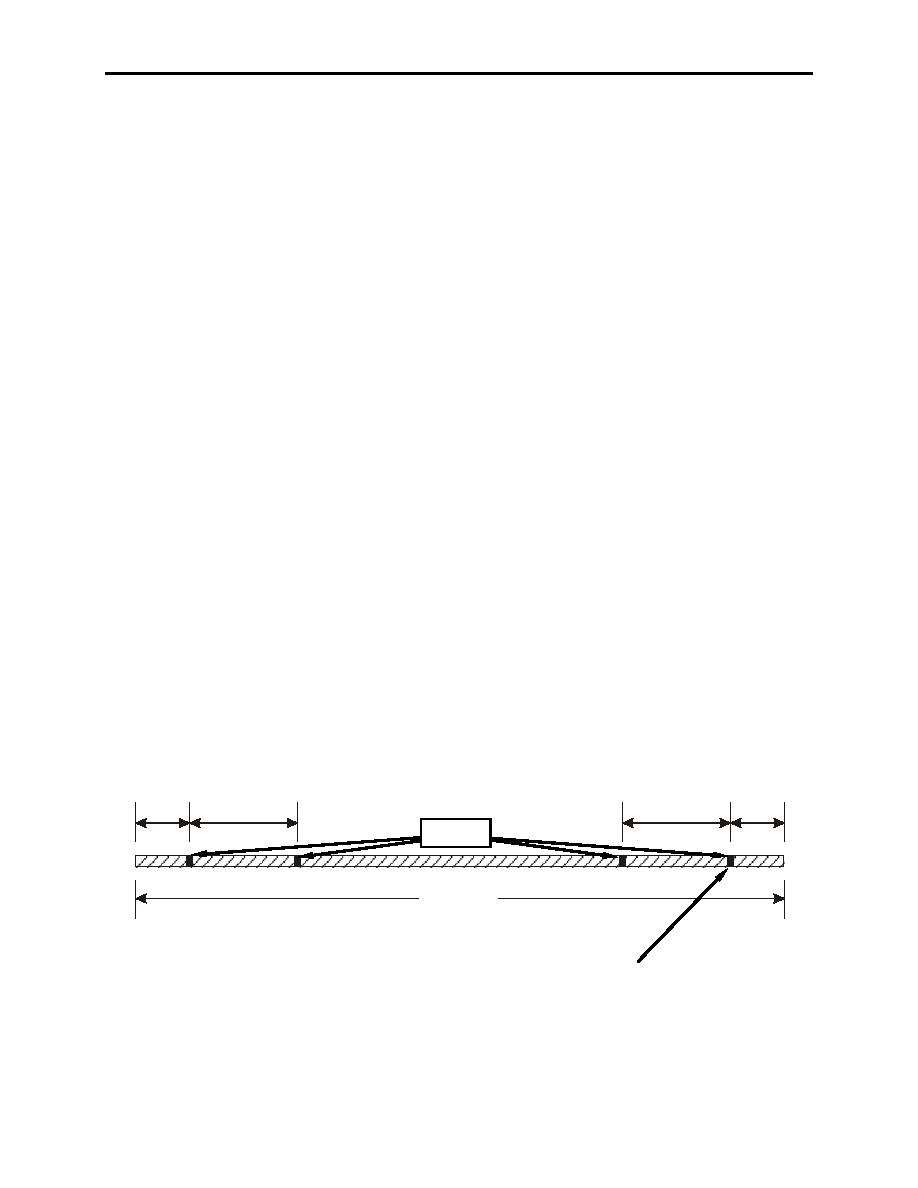
4. Cut a 25-inch length of type II, nylon cord (figure 2). Sear the ends of the cord.
5. Mark cord 1-inch in from each end.
6. Mark cord 5-inches in from each end.
7. Position one end of the new vent line in the exact location formerly occupied by the end of the old line
by lining up the 5-inch mark with the top edge of the upper lateral band.
NOTE
Measure from the outside edge of the upper lateral band, the vent line should be extend
4 inches into the radial seam.
8. Ensure there are no twists in the line and that it has been properly routed.
9. Using a zig-zag sewing machine and size E nylon thread, stitch the new vent line into place. Begin by
stitching on the line 1/2-inch above the vent band; sew across upper lateral band, scissor cut vent line
at 1-inch mark and sew to 1/2inch beyond the line, 7 to 11 stitches per inch and 1/8-inch wide.
10. Pass the remaining end of the line under the other vent lines, and through the vent loop, as required.
11. Ensure there are no twists in the line and that it has been properly routed.
12. Position and sew the remaining end of the line to the opposite side of the canopy, as detailed in steps
7 9 above.
1 in
4 in
4 in
1 in
Marks
25 inches
Scissor cut here during installation
Figure 2. Main Canopy Vent Line Replacement.
END OF WORK PACKAGE
0021 00-2


