TM 10-1670-327-23&P
0064 00
REPLACE
NOTE
Each mesh panel is a complete assembly that is sewn over a finished opening.
Replacement entails removing the damaged mesh panel assembly and sewing a new
one in the same location.
NOTE
A double needle sewing machine may be used in place of a single needle sewing
machine.
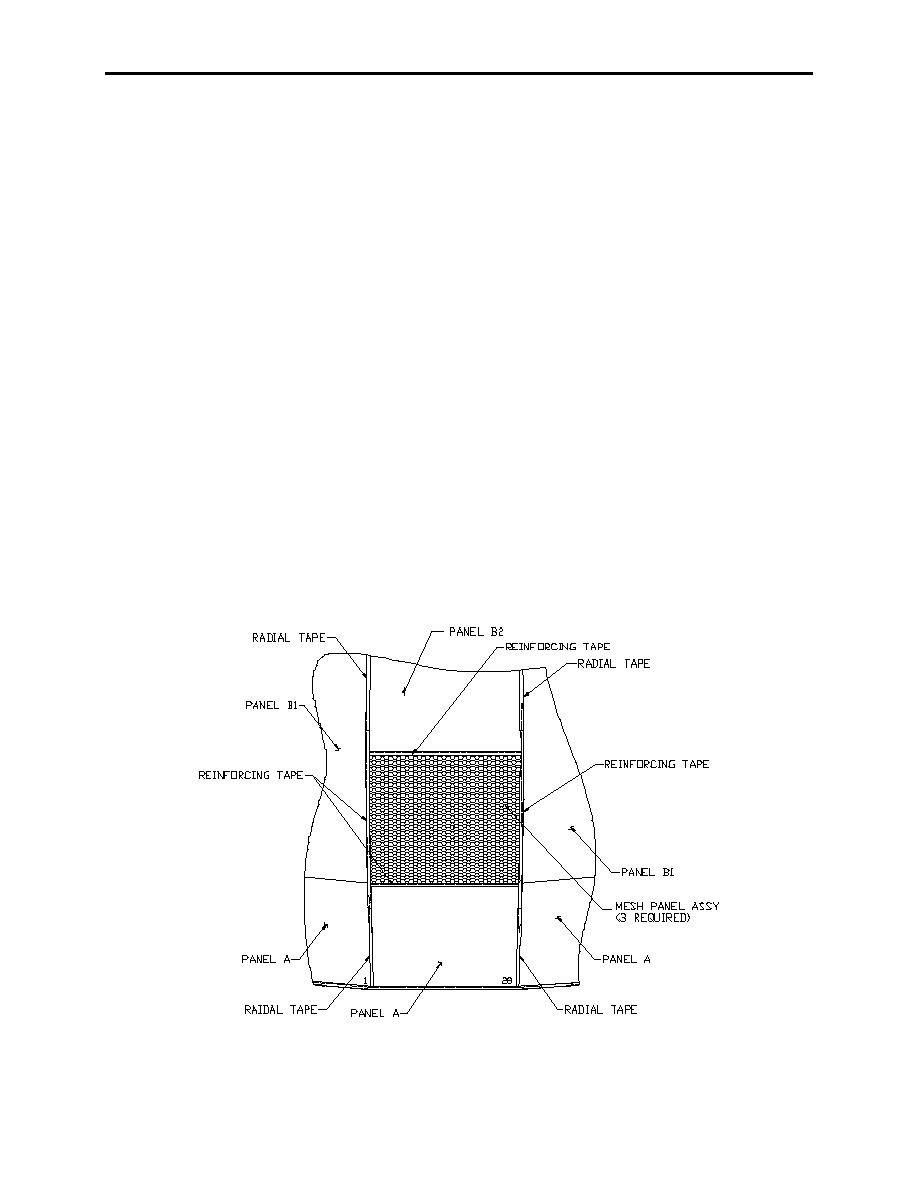
Replace a damaged mesh panel as follows:
1. Carefully remove the damaged mesh panel assembly. Take note on how the mesh panel is attached.
Clean the area by removing all loose pieces of thread.
2. Take a new mesh panel assembly and in the same manner as the original mesh panel was
positioned, align an upper corner of the new mesh panel with an upper inside corner of the opening.
3. Laying the reinforcement tape on top of the new netting and radial seam for at least 4 inches beyond
the mesh panel with the end folded under a minimum of 1/4-inch on both ends.
4. Repeat for the opposite side
5. Using a single needle sewing machine and nylon size E thread, begin sewing at least 4 inches before
the end of the mesh panel radial tape and sew the entire radial seam of the new mesh panel to the
canopy, sewing past the other end by at least 4 inches. Repeat for the other radial.
6. Using a single needle sewing machine and nylon size E thread, sew the top of the new mesh panel to
the opening. Backstitch both ends a minimum of 1/2-inch. Repeat for the bottom.
Figure 4. Replace Damaged Mesh Panel.
END OF WORK PACKAGE
0064 00-3/(4 Blank)


