
TM 9-1370-202-12
1. Remove thumbscrews from fuze
WARNING
setting dial, using pliers, if necessary.
(Retain
Do not use 5-second setting on
thumbscrew for reuse, if flare is not expended.).
Mods 1 and 2 as there is a dud
problem at this setting. Setting
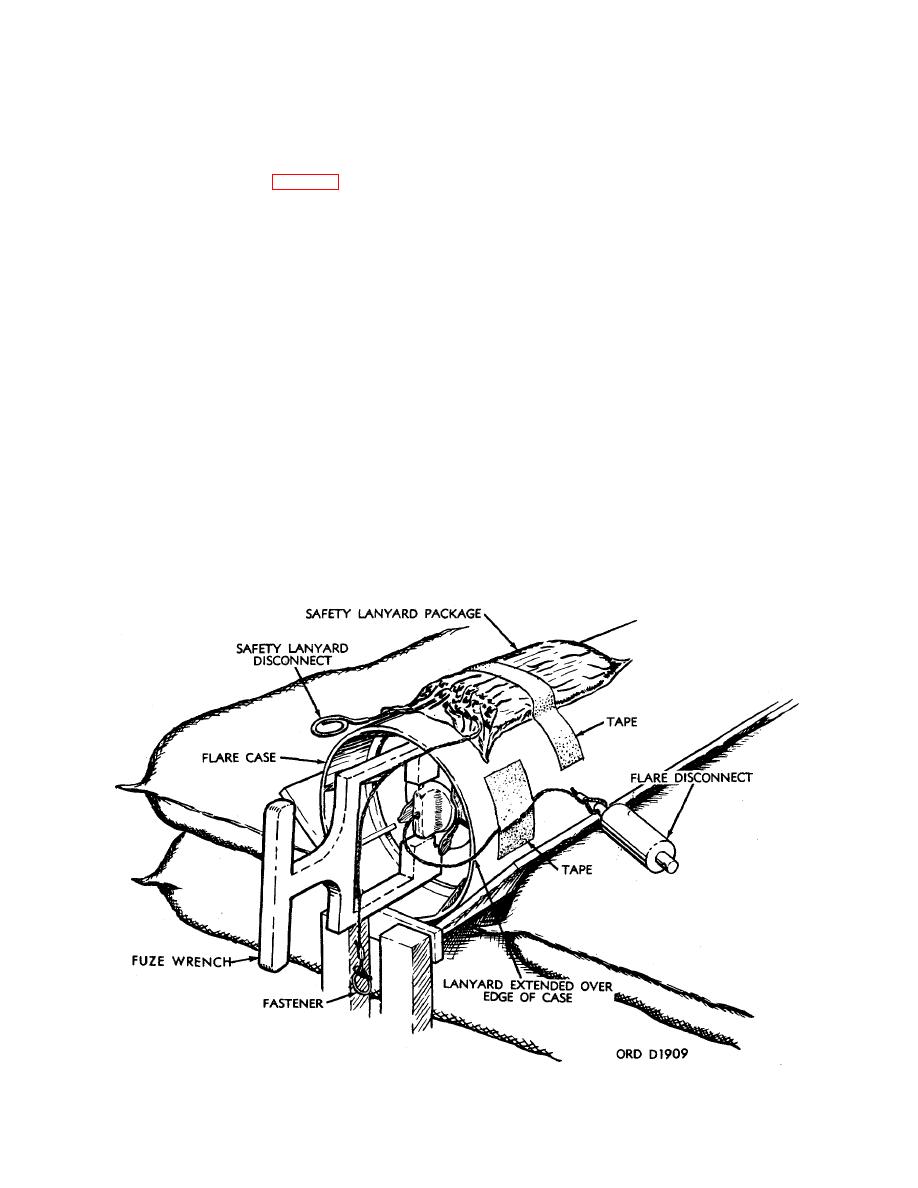
2. Place fuze wrench between raised
fuze between 5-second intervals
grips on yellow fuze setting dial (fig. 3-8); depress dial,
will also result in duds.
turn clockwise to desired setting, and release. (Setting
may vary from 5 to 30 seconds, but in 5 second
1. Manually depress small dial with
increments only.)
white arrow, turning clockwise to desired setting; then
3. Assure that dial is locked in set
release. (Fuze setting may vary from 10 to 30 seconds,
position by attempting to move dial without depressing
but in 5-second intervals, only. Operator will be able to
it. Take care not to pull lanyard by fouling it with fuze
feel when dial locks in 5-second detent.)
wrench during operation.
2. Assure that fuze setting dial has
4. Assure that dial has returned to
returned to uppermost position by placing screwdriver
uppermost position by placing screwdriver under dial
under dial and prying up gently.
and prying up gently.
3. If fuze cannot be set or if dial does
not lock in position, set flare aside for disposal in
(f) Set ejection fuze on Mod 4 as follows:
accordance with TM 9-1300-206 and AR 385-63.
1. Loosen thumbscrew in larger, outer
dial by backing off counterclockwise two turns.
(h) Remove safety pin from ignition fuze dial
on Mods 2A, 3 and 4. (Mods 1 and 2 do not have safety
2. Turn dial to desired setting. It is not
pins.) Retain serviceable safety pin for reuse, if flare is
necessary to depress dial.
not expended. Discard bent or damaged safety pins.
3. Tighten
thumbscrew
by
turning
clockwise.
(i) Position
cardboard
disk
on
lanyard
(g) On all Mods, set ignition fuze as follows:
Figure 3-8. Fuze wrench in position.
3-10
