TM 10-1670-201-23
T.O. 13C-1-41
NAVAIR 13-1-17
retaining strap location. Secure the webbing end by
(c) Remove the safety clip from the
restitching leather pad according to original construction
attaching loop on the opposite end of the strap and
details and paragraph 3-9, using size 5 or 6 nylon thread
retain the clip for further use, if serviceable.
and a heavy duty sewing machine, stitching 5-8 stitches
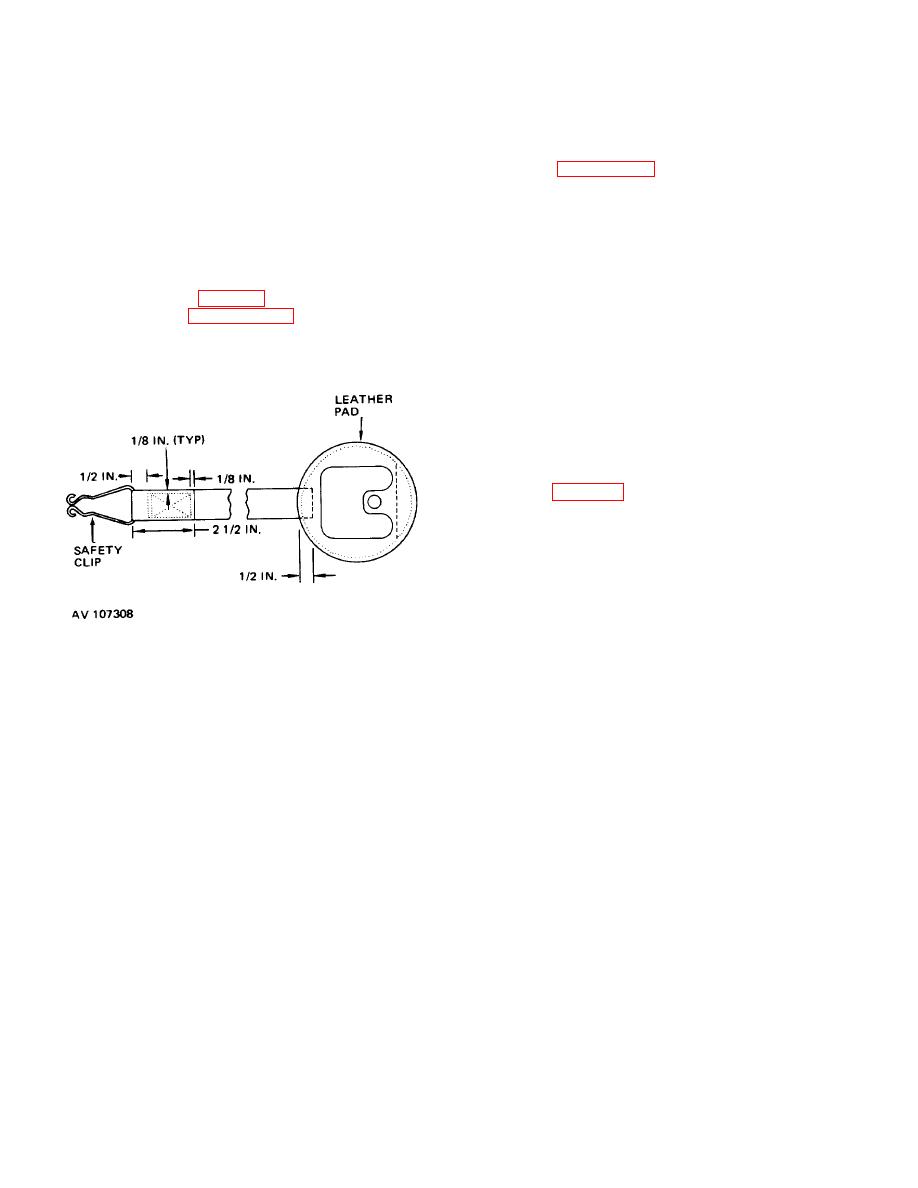
(d) Cut a 10 1/2-inch length of 1-inch-
per inch.
wide type IV yellow nylon webbing and wax the ends.
(g) Install a serviceable safety clip in
(e) Make a 2 1/2-inch-long foldback on
the 1/2 inch-long loop on the strap running end.
one webbing end and beginning at a point 1/2 inch back
b. Replacement.
A parachute harness quick
from the folded edge, secure the foldback by stitching a
release pad that is damaged beyond repair will be
7/8-inch-long single-X-box stitch formation, 1/8-inch in
replaced with a serviceable item from stock.
from each side edge (fig. 3-31). Stitching will be made
WARNING
in accordance with paragraph 3-9, using size E nylon
Use of any type connector link
thread and a light duty sewing machine, stitching 7-11
assembly other than the L-bar
stitches per inch.
connector link assembly on US Army
trooptype personnel parachutes and
ejection
seat
parachutes
is
prohibited.
3-30. Parachute Connector Link Assemblies.
The three types of parachute connector link assemblies
used on airdrop equipment are the L-bar, U-bar, and
quick-fit (fig. 3-32). The L-bar connector link is the
most common of the three link assemblies and has no
restrictions on use. However, the U-bar and quick-fit
connector link assemblies do have limited application
for use on US Army airdrop equipment. The U-bar
connector link assembly will only be used on cargo-type
airdrop items, which include cargo parachutes. The
quickfit connector link assembly is limited for use on
emergency-type personnel parachutes only. A damaged
parachute connector link assembly will be repaired or
Figure 3-31. Parachute harness quick release pad
replaced using the following procedures, as applicable.
construction details.
(f) Insert 1/2 inch of the opposite
webbing end between the layers of pad leather in the
original
3-51


