
TM 10-1670-201-23
T.O. 13C-1-41
NAVAIR 13-1-17
a. Repair.
(1) Cleaning. Remove burrs, rough spots,
rust, or corrosion from a parachute connector link
assembly by either filing with a metal file or buffing with
a crocus cloth.
(2) Replacing a locking screw. Replace a
damaged or missing locking screw on a parachute
connector link with a serviceable item from stock.
b. Replacement.
A parachute connector link
assembly, regardless of type, which is damaged beyond
repair will be replaced with a serviceable L-bar
parachute connector link assembly from stock and the
following procedures:
(1) Using
a
suitable
sized
flat-tip
(commonhead) screwdriver, remove the two locking
screws from the ends of a replacement L-bar parachute
connector link assembly and disassemble the link.
(2) Using
a
suitable
sized
flat-tip
(commonhead) screwdriver, remove the two locking
screws from the damaged original parachute connector
link assembly. Disassemble the link assembly, using a
link separator, (fig. 3-33), if necessary. If the connector
link contains suspension lines, insure the lines are not
allowed to slide off of the damaged link during the
disassembly process.
Figure 3-33. The parachute connector link
separator.
(3) As applicable, position an L-bar of the
replacement link assembly adjacent to the disassembled
original link assembly and slide the suspension lines
from the damaged link onto the replacement link L-bar.
(4) If required, pass the remaining L-bar of
the replacement link through the attaching loop of the
adjoining component.
(5) Fit the replacement link L-bars together
and insure L-bar leg engagement by tapping the end of
each L-bar with a phenolic mallet.
(6) As applicable, trace the suspension -lines
from the connector link assembly to the canopy skirt to
insure the lines are properly installed and in the correct
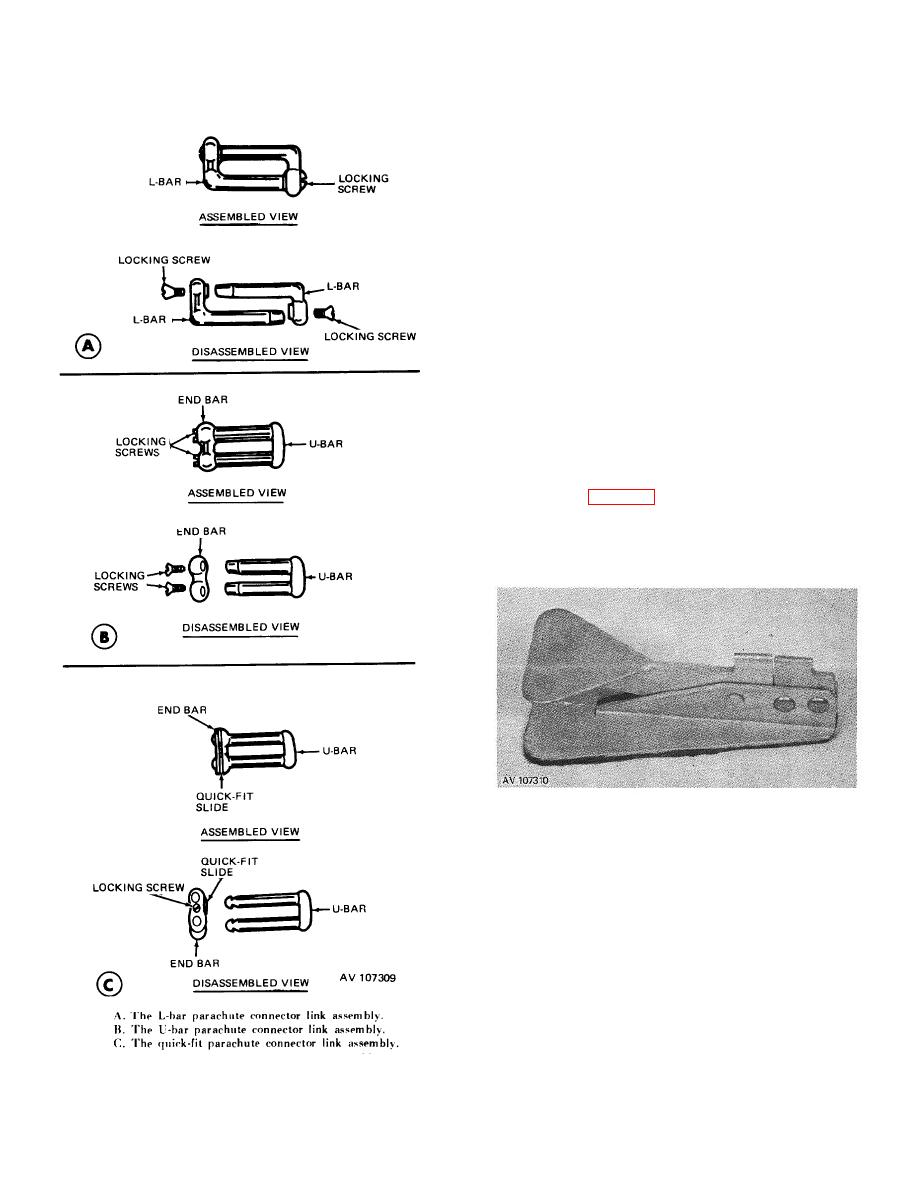
Figure 3-32. Parachute connector link assemblies
sequence.
3-52
