TM 10-1670-269-23&P
0013 00
0013 00-22
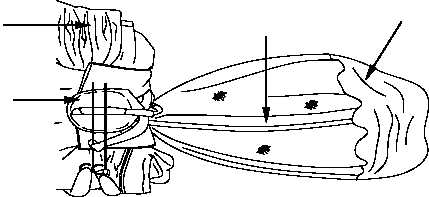
9. Ensure there are no twists at the attachment point of the bridle line and the pilot parachute.
10. Spread out the pilot chute so it is laying flat on the table. Ensure that all slack is removed from the
centerline.
11. Grasp the pilot chute in the middle of two radial seams where the netting material is sewn to the nylon
canopy portion of the pilot chute.
12. With the right hand, raise the pilot chute and align radial tapes. With the left hand, sweep remaining
pilot chute to the left side of pack table and lay the pilot parachute down.
13. Continue to grasp each section on the pilot chute in the center and fold until the pilot parachute is
folded.
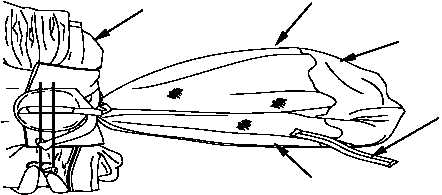
14. Flatfold the pilot chute so there are three folds on each side with the centerline and radial tapes in the
center.
15. Fold the right side of the pilot chute 4-inches from the top portion past the radial tapes. Fold back on
it self approximately 4-inches. Repeat these procedures for the left side.
Pilot Chute
Centerline
Ejector Spring
Canopy
Pilot Chute
Packing
Weight
Right Side Folded
Canopy
Top Portion of Pilot
Chute


