ARMY TM 10-1670-275-23&P
AIR FORCE TO 13C5-25-2
NAVY NAVAIR 13-1-26
4706-073
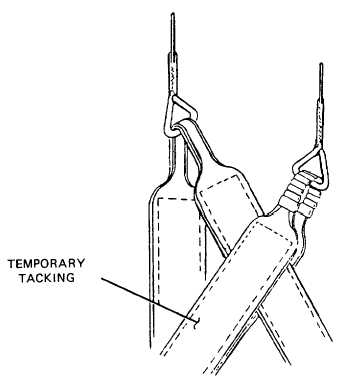
Figure 2-69. Attaching Left and Right Risers.
(14) Using a heavy duty sewing machine and size 3 nylon thread, secure overlapped webbing ends on
each riser strap by stitching a 3 inch long four-point WW stitch formation. Insure temporary tacking
is removed from each of overlapped webbing end areas prior to stitching. Stitching will be 5 to 8
stitches per inch (figure 2-63).
(15) Aline the riser suspension line attaching loops according to figure 263 and secure the webbing plies
of each riser length together by stitching a 26-Inch-long box-stitch formation. Also stitch a single-X
in the box formed at the point where the left and right riser straps Intersect. Stitching will be 5 to 8
stitches per inch using a heavy duty sewing machine and size 3 nylon thread.
(16) At a point 2 inches above the riser clevis attaching loop on each riser strap, stitch a 2Inch-long
single-X box-stitch formation, with one double end, according to the details in figure 2-63. Stitching
will be 5 to 8 stitches per inch using a heavy duty sewing machine and size 3 nylon thread.
Remove the temporary ties made on the lower end loops of each suspension line group.
2-95