TM 10-1670-201-23
T.O. 13C-1-41
NAVAIR 13-1-17
a 1/2-inch foldback of each raw edge. Pin and baste
each edge foldback using the procedures in paragraph
(g) Using the same type material as in
original canopy construction, mark and cut a patch 2
1/2-inches wider and longer than the inside
measurements of the prepared hole. Insure that one
side of the patch material is marked and cut along the
warp or filling of the fabric.
(h) Center the patch material over the
prepared hole and insure the warp or filling of the patch
material matches the warp or filling of the fabric being
patched. Pin the patch material in position.
(i) Make a 1/2-inch foldunder on each
edge of the patch material and baste the patch to the
prepared area. Basting will be performed using the
procedures in paragraph 3-8.
(j) Remove the pushpins securing the
canopy to the repair table and secure the patch by
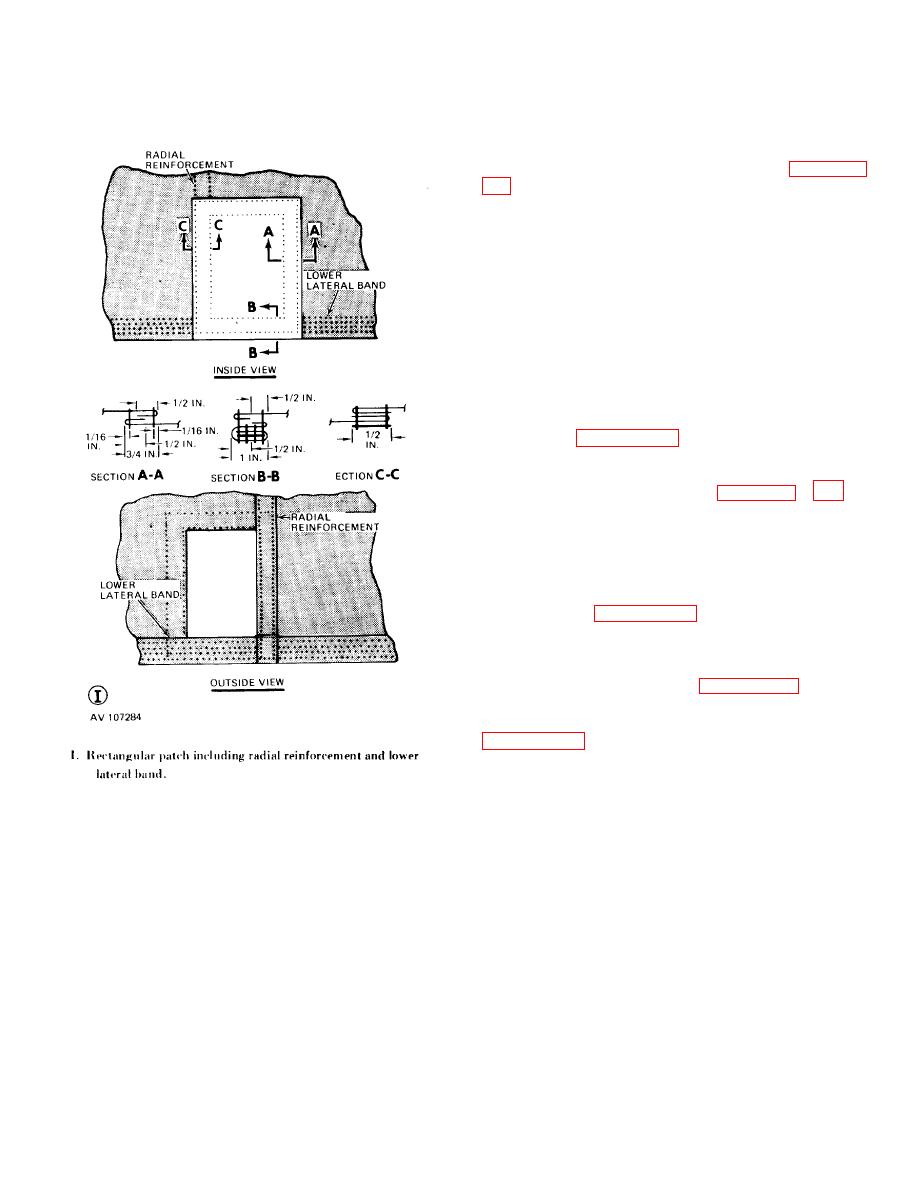
stitching according to the details in figures 3-7 or 3-8, as
applicable, using the stitching specifics outlined in the
applicable item equipment publication. Make the first
row of stitching completely around the edges of the
patch. Turn the canopy right side out and make a
second row of stitching around the edges of the
prepared hole.
Stitching will be performed in
accordance with paragraph 3-9.
(k) Reposition the items removed or
laid aside in (b) above in the original location and secure
each item to the canopy by restitching according to
original construction details and paragraph 3-9.
(I) If applicable, restencil informational
data or gore numbers according to procedures in
(2) The pressure-sensitive (iron-on) patch. A
miscellaneous patch constructed from pressure-
Figure 3-8. Common miscellaneous patches for
sensitive-coated cotton balloon cloth will only be applied
block-constructed canopies (sheet 5 of 5).
to the cotton muslin canopies of the G-14, G-13. and
(d) Using an authorized marking aid of
the 12- and 26-foot-diameter high-velocity cargo para-
contrasting color, mark a rectangle or triangle around
chutes. Apply a pressure-sensitive (iron-on) patch as
the damaged area. Make the mark 1/2 inch from any
follows:
adjacent seam, reinforcement, or lateral band. Insure
(a) Place the canopy on a work table
that one side of the marked rectangle or triangle is
and smooth all wrinkles from the canopy material
parallel to the warp or filling of the canopy material.
surrounding the damaged area.
(e) Prepare the damaged area hole by
(b) Cut a piece of pressure-sensitive-
cutting along the marks made in (d) above. Also make
coated cotton balloon cloth large enough to extend 1
a diagonal cut at each corner of the formed hole to
inch beyond all edges of the damaged area. If an edge
permit foldback of each raw edge.
of the damaged area is closer than 1 inch to a radial
(f) To complete hole preparation, make
3-22


