
TM 10-1670-201-23
T.O. 13C-1-41
NAVAIR 13-1-17
canopy line to applicable connector link assembly on the
opposite side of the canopy using the procedures in (a)
through (j) above.
3-22. Replacing Radial Lines.
A parachute canopy that does not have continuous
canopy lines may have radial lines which pass through
radial seam channels and extend from the canopy skirt
to the canopy vent. A radial line which is damaged will
be replaced by fabricating as follows:
a. Place the canopy assembly in proper layout on
a repair table or other repair surface and apply partial
tension.
b. Trace the damaged radial line through the radial
seam channel from the canopy skirt to the canopy vent.
c. Cut a length of the same type material used in
original construction according to the length of an
adjacent undamaged radial line under equal tension and
wax the ends. The material length will be the distance
measured from the upper edge of the upper lateral to
the lower edge of the lower lateral band.
d. Cut the stitching that secures the applicable
vent line and the affected radial line to the upper lateral
band and the upper end of the radial seam. Lay the
vent line free end aside.
e. At the canopy skirt, cut the stitching that secures
the end of the applicable suspension line and the radial
line to the lower lateral band and the lower end of the
radial seam. Lay the suspension line free end aside.
f. Attach one end of the material length cut in c
above to the upper end of the original radial line at the
upper lateral band by whipstitching the two ends
together.
g. At the lower lateral band, grasp the end of the
damaged radial line and gradually pull the original line
length through the radial seam channel until the
attached replacement line material end extends from
the lower end of the seam. Release tension from the
canopy assembly.
h. Detach the original radial line end from the
replacement line end by cutting and removing the
whipstitching securing the two lines together.
i. Temporarily secure the replacement radial line
ends to the upper and lower lateral bands, using either
temporary tacking (fig. 3-21) or pushpins. If temporary
tacking is made, the procedures in paragraph 3-8 will
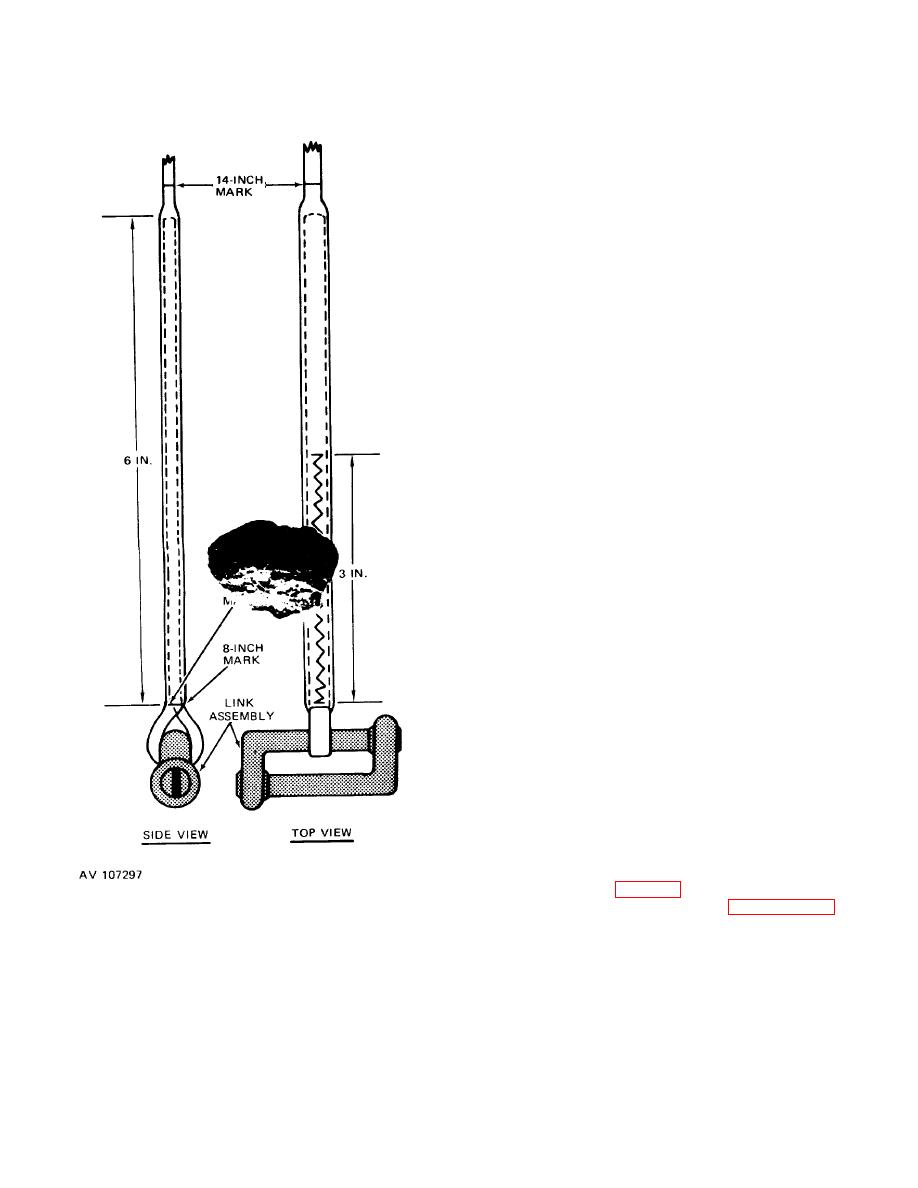
Figure 3-20. Details for attaching a coreless cord
apply.
canopy line to connector link assembly, typical.
(j) Trace the replacement line from the
connector link assembly to the canopy skirt to insure
proper attachment, position, and sequence.
(k) Attach the free end of the
replacement
3-38
