TM 10-1670-287-23&P
0047 00
0047 00-3
INSTALLATION OF AR2 POWER CABLE ASSEMBLY, RESERVE
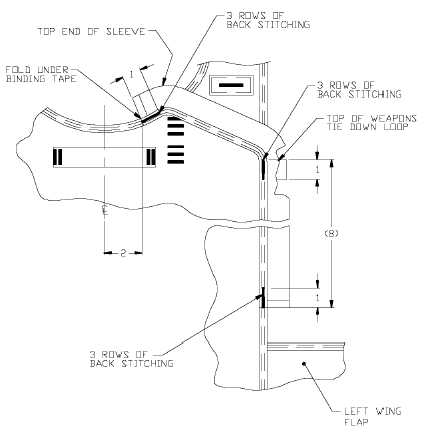
1. Install AR2 power cable sleeve as follows:
a. Measure and mark 2-inches from center of the power cable opening located at the top of the
harness/container assembly between the risers.
b. Align the TOP end of the AR2 power cable sleeve end with the harness/container assembly’s 2-
inch mark.
c. Make a mark approximately 2-inches long, parallel to top of the weapon tie-down loop.
d. Fold under the excess binding tape and stitch AR2 power cable sleeve to the container with three
(3) continuous rows of backstitching from the end of the sleeve to the 1-inch mark with a medium-
duty sewing machine, type 301, and size FF thread, 6 to 9 stitches per inch.
e. The portion of the sleeve (approximately 6 ½-inches) to the 7 ½-inch location mark, as identified
in the illustration, is not attached to the container.
f.
Align the 7 ½-inch location mark on the AR2 power cable sleeve with the top of the
harness/container assembly weapon tie down loop.
g. At this location, stitch remainder of AR2 power cable sleeve to harness/container assembly with
three (3) continuous rows of backstitching for 1-inch.
h. Fold under excess binding tape. Sew remainder of the sleeve (approximately 8-inches) to the
container and finish with a total of three (3) continuous rows of 1-inch backstitching.