TM 10-1670-201-23
T. O. 13C-1-41
NAVAIR 13-1-17
Key to figure 3,-45:
A. Tacking in a pliable material area.
B. Tacking through a stiffener
3-35. Pack Releasing Cones.
Various parachute packs are equipped with metal
pack releasing cones which are used in the opening and
closing of a pack. Repair or replace a pack releasing
cone using the following procedures:
a. Repair. Retacking is the only repair function
performed on a pack releasing cone. Replace broken or
loose pack releasing cone tacking by adapting the
procedures in paragraph b below.
b. Replacement. Replace a damaged or missing
pack releasing cone with a serviceable item from stock
and the following procedures:
(1) If applicable, cut and remove the tacking
securing the original pack releasing cone to the pack.
(2) If required, cut the original stitching and
remove or lay aside any item that may interfere with
replacement accomplishment.
In addition, cut the
tacking securing the unserviceable pack releasing cone
to the pack.
(3) If the fabric area supporting the original
pack releasing cone has been damaged, repair the area
by darning, using the procedures in paragraph 3-10 and
the stitching specifics prescribed in the applicable item
equipment publication. However, if darning does not
provide an adequate repair, construct a suitable sized
reinforcement of the same type material as that used in
the original pack releasing cone location. Secure the
reinforcement to the inside of the damaged area using
the patching procedures in paragraph 3-13 and the
stitching specifics in the applicable item equipment
publication.
(4) Position the replacement pack releasing
cone in the original releasing cone location and insure
the ripcord locking pin hole at the cone top is alined in
the same direction as the original releasing cone or
other installed cones.
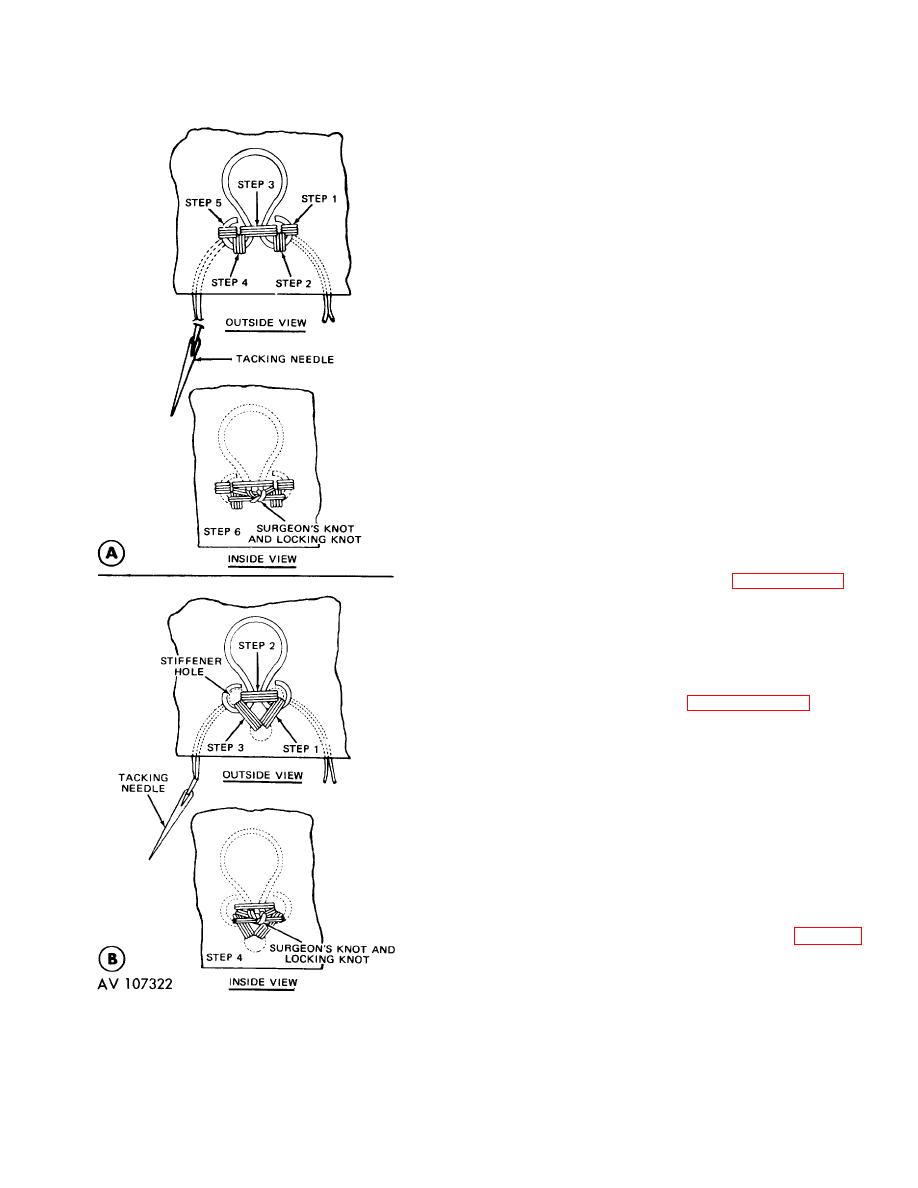
(5) Using one turn double size No. 3 waxed
nylon thread, secure the replacement pack releasing
cone by handtacking as follows:
(a) Pass a threaded tacking needle
from the inside up through the parachute pack panel and
through the No. 1 hole in the cone base (A, fig. 3-46).
Allow 3 inches of the tacking thread free end to remain
on the panel inside.
Figure 3-45. Dressmakers eye (hookeye)
tacking details
3-66


