
TM 10-1670-327-23&P
0007 00
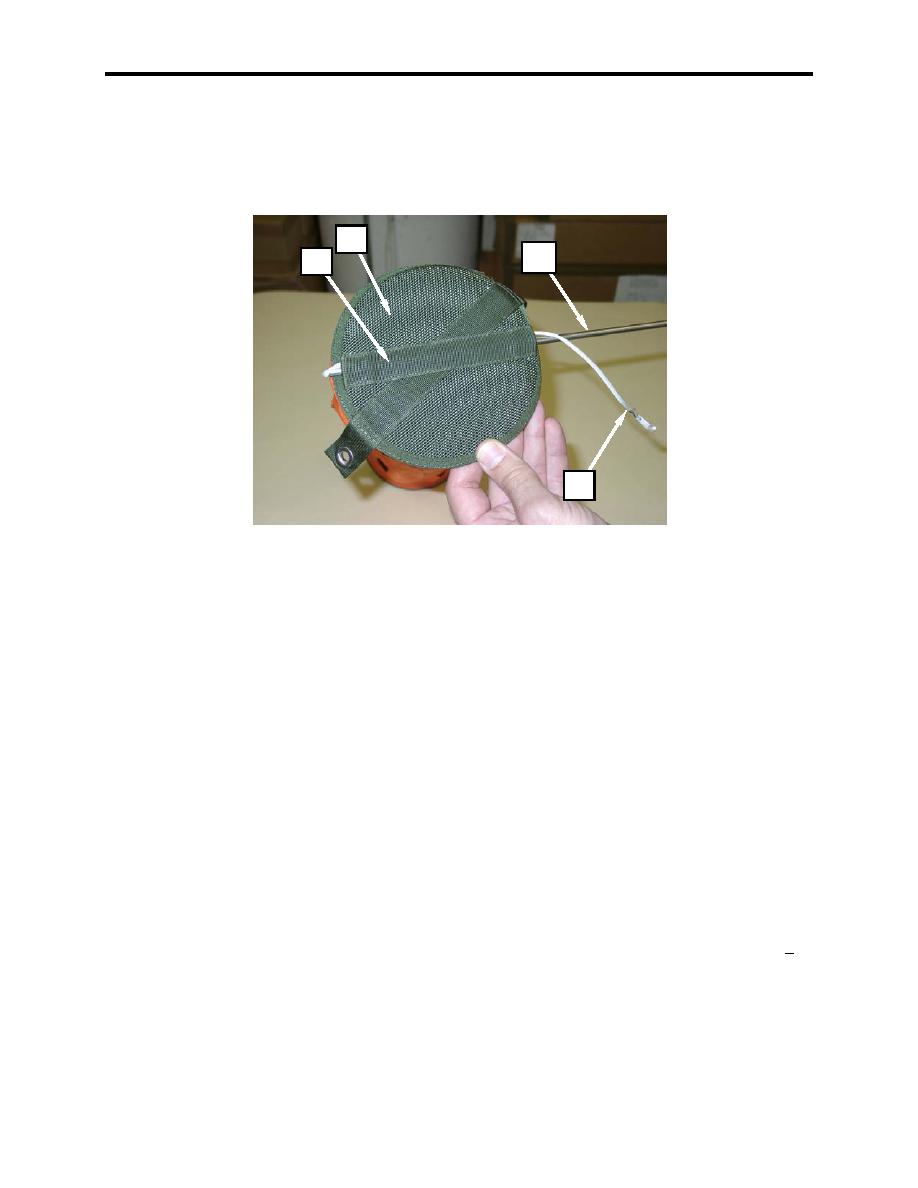
Assemble the Ejector Spring
1. Route the reserve closing loop (figure 2, item 1) through the reserve closing loop channel (figure 2,
item 2) located at the bottom of the ejector spring (figure 2, item 3).
2. To aid in installation, pass the reserve-closing loop (figure 2, item 1) through the eye of the ejector
spring compression rod (figure 2, item 4), pass the compression rod through the channel.
3
4
2
1
Figure 2. Assembling the Ejector Spring.
Attaching Extractor
1
2
1. Arrange the canopy on the pack table with gore 1 on top.
2. Disconnect the packing loop from the apex hook.
NOTE
Insure the extractor vent bridle lines are straight and free of twists.
3. Layout the extractor immediately above the apex insuring the extractor vent bridle lines are free of
turns, tangles and twists.
4. Locate the four apex extractor attaching loops (figure 3, item 1) attached to the apex of main seam
numbers 4, 9, 14 and 19. The four attachment loops are identified by the OD color on each of the four
extractor attaching loops.
5. Route one end of a 12-inch length of one turn single Spectra cord (figure 3, item 2) through one end
of the apex extractor attaching loop (figure 3, item 1), through the looped end of the extractor vent
bridle line (figure 3, item 3), and back through the apex extractor attaching loop (figure 3, item 1).
0007 00-2
